How to Host a Virtual Event in 2026: A Step-by-Step Guide

.webp)
Hosting a virtual event takes more than a speaker, a meeting link, and a few reminder emails. Without clear virtual event planning, even a well-intentioned event can turn into another passive online meeting where attendees multitask, drop off, or leave without taking action.
If you are wondering how to host a virtual event from start to finish, the process starts with setting clear goals, choosing the right event type and virtual event platform, building a structured agenda, planning attendee engagement, preparing speakers, going live, and measuring results afterward. This guide walks you through each step.
{{table-of-contents}}
How to Host a Virtual Event in 10 Steps
To host a virtual event successfully, you need a clear plan for what happens before, during, and after the live experience. The steps below give you a quick overview of the full process. We will go into more detail for each step throughout the guide.
- Define your goals, audience, and success metrics so every planning decision supports a clear outcome.
- Choose the right type of virtual event based on your goal, audience size, and interaction needs.
- Choose the best virtual event platform for your agenda, attendee experience, and engagement goals.
- Build a landing page and registration flow so attendees know what to expect and how to join.
- Create a virtual event agenda with breaks, interaction, and enough variety to avoid screen fatigue.
- Plan attendee engagement before, during, and after the event.
- Prepare speakers, moderators, and the tech team so everyone knows their role before event day.
- Promote your virtual event through email, social media, speakers, partners, and relevant communities.
- Host the virtual event live with clear instructions, smooth transitions, and a backup plan.
- Follow up and measure success using recordings, surveys, engagement data, and then repurpose content from the event to extend its value after the live session ends.
Use this 10-step overview as a quick roadmap. Before getting into the planning details, let’s define what a virtual event is and how it works.
What Is a Virtual Event and How Does It Work?

A virtual event is an online gathering where attendees participate in sessions, networking, and presentations via a digital platform rather than in a physical space. Virtual events can be hosted live, on-demand, or as a combination of both formats.
From webinars and workshops to career fairs and large conferences, virtual events give organizations a flexible way to connect with people from anywhere in the world without needing everyone in the same room. While this makes virtual events a strong choice for reach and accessibility, choosing between virtual vs hybrid vs in-person events still matters because each format changes who can attend, how people participate, and what kind of experience you need to design.
Virtual vs. Hybrid vs. In-Person Events: Which Should You Choose?

The right event format depends on your audience, goals, budget, and how much interaction you want to create. A virtual event works best when you want reach and flexibility, a hybrid event works when you need to serve both in-person and remote attendees, and an in-person event works best when the experience depends on physical presence.
This decision can also be easier with the right planning support. Remo’s AI Event Assistant helps organizers evaluate event goals, audience needs, budget, and engagement priorities, then recommends whether a virtual, hybrid, or in-person format makes the most sense.
Create a Virtual Event Planning Timeline
Before you start working through the steps, it helps to map out when each major task should happen. After supporting different types of virtual events over the years, from webinars to networking sessions and multi-session conferences, we have found that the strongest virtual event planning timelines usually follow the same pattern: early goal-setting, enough time for promotion, a full speaker rehearsal, and fast post-event follow-up. For most teams, that means starting at least 6 to 8 weeks before the event.
With the timeline in place, you can start working through the actual steps of hosting a virtual event, beginning with your goals and audience.
If you need help turning those goals into a stronger event concept, Remo’s free AI Event Idea Generator can use details like your event type, description, and target audience to suggest personalized event ideas in minutes. This gives your planning process a faster starting point before you finalize the event type, agenda, and engagement strategy.
Step 1: Define Your Goals, Audience, and Success Metrics
Every decision you make regarding your virtual event should be rooted in your core goal. A lead-generation webinar requires a different approach than a networking mixer, team-building session, or fundraiser. Before you lock in your speakers, software, or promotion, clarify exactly what you need to achieve.
Questions to answer before you start
Before you get into the details, try to answer these core questions:
- Who is this event for?
- What problem does it solve for your attendees?
- What should they learn, do, or feel by the end?
- What action should they take once the event is over?
- Is the main goal leads, revenue, community, training, sponsorship, or retention?
- What does success actually look like for this specific event?
Your answers will dictate your agenda, the content you create, the features you need in a platform, and how you handle follow-up.
Metrics to track
Focus on the numbers that actually align with your goals. Useful data points include:
- Registration and attendance rates
- Session engagement and duration
- Chat, poll, and breakout participation
- Sponsor interactions
- Leads generated or meetings booked
- Survey feedback and overall revenue impact
The goal isn’t just to prove that people showed up; it’s to understand if the event delivered real value to your audience and moved the needle on your business objectives.
Step 2: Choose the Right Type of Virtual Event for Your Goal
Before you jump into the agenda or start evaluating platforms, decide on the format that best aligns with your goals. The right choice depends on what you want to achieve, your audience size, and the level of interaction you need.
Webinar vs. Virtual Conference vs. Networking Event: What’s the Difference?
Different types of virtual events serve different goals. A webinar is usually built for education or lead generation, while a virtual conference supports multi-session learning, sponsors, and larger audiences. A networking event is more focused on conversation, relationship-building, and attendee movement.
This comparison helps you avoid choosing a format that does not match your goal. For example, a webinar may work well when attendees mainly need to watch and ask questions, but a networking event needs a platform that supports smaller conversations and easier attendee movement.
.webp)
Step 3: Choose the Right Virtual Event Platform
The right platform depends on your event size, format, audience needs, branding, sponsor requirements, and reporting goals. A simple meeting tool might be fine for a small internal sync or a basic webinar, but it often falls short when you need structured virtual event networking, attendee movement, private conversations, sponsor visibility, or deep analytics.
Look for a platform that’s intuitive for attendees and easy for you to manage. The experience should feel smooth from the moment someone registers to when they join a session, ask a question, or jump into a conversation.
Virtual event platform features to look for
When comparing virtual event platforms, look for features such as:
- Main stage or presentation mode for keynotes, panels, and announcements
- Small-group networking or virtual tables for natural attendee conversations
- Live engagement tools such as chat, Q&A, polls, and reactions
- Registration and attendee access controls for smoother sign-up and controlled entry
- Sponsor spaces for booths, demos, branded visibility, and lead capture
- Attendee analytics to track participation, engagement, and event performance
- Also check accessibility and privacy basics. Look for virtual event platform features like captions, clear recording notices, attendee consent options, secure registration, and reliable handling of attendee data.
The best platform is not always the one with the longest feature list. It is the one that matches the experience you are trying to create.
When to Use a Meeting Tool vs a Webinar Platform vs Virtual Event Platform
A standard meeting tool works for simple internal calls or small presentation-based sessions. A webinar platform is better when you need registration, branded presentation, Q&A, and attendee tracking. But once your event needs networking, sponsor visibility, multiple tracks, or attendee movement, a dedicated virtual event platform is usually the better fit.
This is why choosing your platform early is so important. The technology you pick dictates what your attendees can actually do. If they just need to watch and ask questions, a meeting tool or a webinar platform is fine. If you want them moving between conversations, visiting sponsor areas, and networking naturally, a dedicated platform like Remo can give you more control over the full attendee experience.
Step 4: Build a Landing Page and Registration Flow
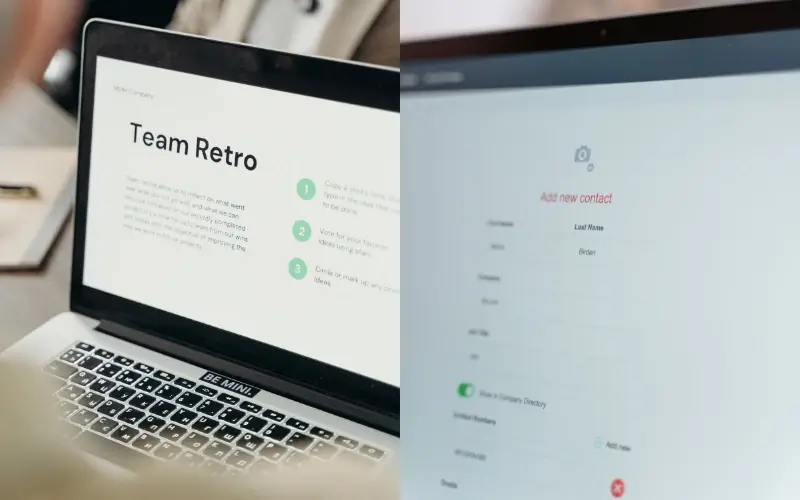
Your landing page is the first touchpoint of your event, so it needs to clearly articulate the value while making the sign-up process as frictionless as possible. Before someone commits, they should know exactly what the event is about and who it is for. They should also understand what they will gain and why it is worth their time.
What to include while creating your landing page
A strong landing page covers the essentials without cluttering the user experience:
- Event title and clear value proposition: State the "why" immediately.
- Target audience: Help attendees identify if this is for them.
- Date, time, and time zone: Be specific to avoid any confusion.
- Agenda: Give them a clear look at what to expect.
- Speaker bios: Establish credibility.
- Sponsor details: Highlight partners where relevant.
- Registration form: Keep it simple, only ask for what you absolutely need.
- FAQ: Address common questions upfront.
- Calendar link: Make it easy for them to save the date.
- Access instructions: Explain clearly how to join once they’ve signed up.
Designing the flow
Your registration flow should match the complexity of your event. For a straightforward webinar, a basic form and an automated joining link usually do the trick. However, if you’re hosting a larger or more interactive event, you might want to use unique links, attendee accounts, or private invites.
Track registration sources and conversions
You should also track how people find and complete registration. Use UTM links for email, social media, paid ads, speaker promotions, and partner campaigns so you can see which channels drive sign-ups. Tools like GA4 can help you track landing page views, completed registrations, and drop-off points.
This step is critical because registration is the first real part of the attendee experience. If the page is confusing or the sign-up process is a hurdle, you’ll lose people before they even get to the event.
Step 5: How Do You Structure a Virtual Event Agenda to Prevent Screen Fatigue?
A successful virtual event agenda needs to be sharper, faster, and more interactive than an in-person one. Online attendees are prone to distractions, so long-winded presentations and back-to-back sessions are a fast track to low attendance and drop-offs.
Instead, build your agenda around energy and active participation. Mix your presentation time with Q&A, polls, breaks, and networking so attendees stay involved rather than just sitting back as observers.
How long should a virtual event be?
The right length depends on the type of virtual event, but shorter sessions usually work better online. As a common guideline, webinars often work well in the 45 to 60 minute range, while networking events may need 60 to 90 minutes so attendees have enough time to connect.
Virtual conferences can run longer, but only if the agenda includes breaks, shorter sessions, and varied activities like Q&A, networking, sponsor moments, and discussion time. The goal is not to make the event as long as possible. It is to give attendees enough value without creating screen fatigue.
Here is a sample agenda for a half-day virtual conference:
This structure keeps things moving by alternating between listening and doing. It gives you clear opportunities to guide participation throughout the day, rather than hoping your audience stays engaged on their own. Tools like Remo’s AI Run of Show and Agenda follow virtual event best practices to help organizers turn early event ideas into a structured virtual event agenda, map out key moments, and keep sessions moving on time.
Step 6: Plan Attendee Engagement Before, During, and After the Event
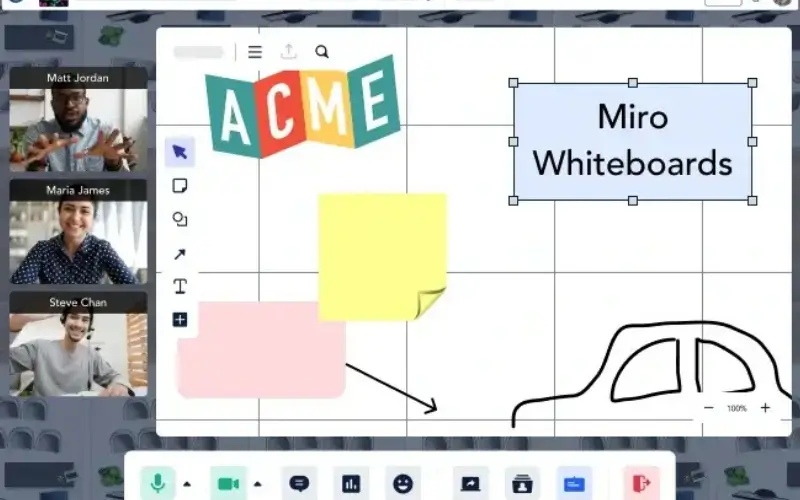
Virtual event engagement shouldn’t be an afterthought. It needs to be integrated into the entire event journey, from the first registration confirmation to your final follow-up. If you wait until the event is live to spark interaction, attendees are more likely to tune out, multitask, or drop off entirely. Remo’s internal data from January to now shows an average of 25.8 connections per user, which points to the value of designing virtual events around active networking rather than passive viewing.
Before the event
Build momentum and expectation early. Use registration questions, polls, and reminder emails to set the tone. Clearly communicate how attendees will participate, whether that’s through live Q&A, small breakout groups, or visiting sponsor booths, so they know exactly what to expect.
The first five minutes
Hit the ground running. Use a chat prompt, a quick poll, or a simple icebreaker right as people join. This signals that the event isn't a passive webinar, encouraging people to participate from the start rather than just lurking until the end.
During sessions
Keep the energy high by planning interaction into longer sessions. As a useful rule of thumb, plan an interactive moment every 10 to 15 minutes using creative touches like live challenges, “choose the next question” prompts, role-based discussion groups, audience shoutouts, quick reflection moments, or short table activities. For more virtual event networking ideas, build in small-group conversations with 3 to 5 people, guided prompts, and timed rotations so the experience feels active instead of one-way.
After the event
Keep the conversation going. Send a brief survey, share session recordings, and invite attendees to a follow-up space. Use your engagement data to see what worked and what you can improve for next time.
Your engagement options will depend on the platform you choose. Basic tools may give you chat, Q&A, and polls, while platforms like Remo are designed around active participation, with table-based networking, attendee movement, conversation prompts, and other ways to build engagement for your online event. You can also use AI to brainstorm engagement ideas based on your audience, event type, and session goals.
Step 7: Prepare Speakers, Moderators, and the Tech Team
A polished event depends on everyone knowing their role before the cameras go live. Your speakers, sponsors, moderators, and tech team should be aligned on the agenda, timing, interaction plan, and backup process.
Speaker preparation
Get slides, videos, and session materials well in advance. Decide whether each session should be live, pre-recorded, or a mix of both. Live sessions allow real-time interaction, but they also carry more risk, from poor internet to audio or screen-sharing issues. Pre-recorded sessions are smoother and easier to control, but they limit audience interaction. For many virtual events, a hybrid approach works best: pre-record the main presentation, then bring the speaker in live for Q&A, chat, and follow-up discussion. If you choose a fully live format, keep a backup recording ready in case last-minute technical issues happen.
Sponsor preparation
If your event includes sponsors, confirm their assets and involvement early. Collect logos, booth materials, demo videos, resource links, CTAs, lead capture requirements, and any sponsor questions or talking points before the event. Sponsors should also know where they appear in the agenda, how attendees will interact with them, and what data or post-event reporting they can expect.
Moderator preparation
Your moderator should manage the chat, feed questions to speakers, guide transitions, and keep the session moving. If energy drops, they should be ready to step in with a prompt, audience question, or quick transition.
The technical rehearsal checklist
Always run a full-scale virtual event technology test. It’s the best way to catch issues before your audience does. Check these off your list:
- Test speaker internet speed before the event, (e.g., minimum 10 Mbps upload).
- Recommend a stable wired connection where possible.
- Ask speakers to avoid public Wi-Fi.
- Confirm browser compatibility with the event platform, (e.g., "WebRTC-compatible Chromium browsers like Google Chrome or Microsoft Edge").
- Test microphone, camera, lighting, screen sharing, slides, videos, chat, Q&A, recording, and backup host access.
- Keep a private team chat and emergency contact process ready.
- Assign a backup host with copies of slides and session materials.
A rehearsal helps your team catch issues before attendees experience them. It also gives speakers and moderators more confidence on event day.
Step 8: Promote Your Virtual Event
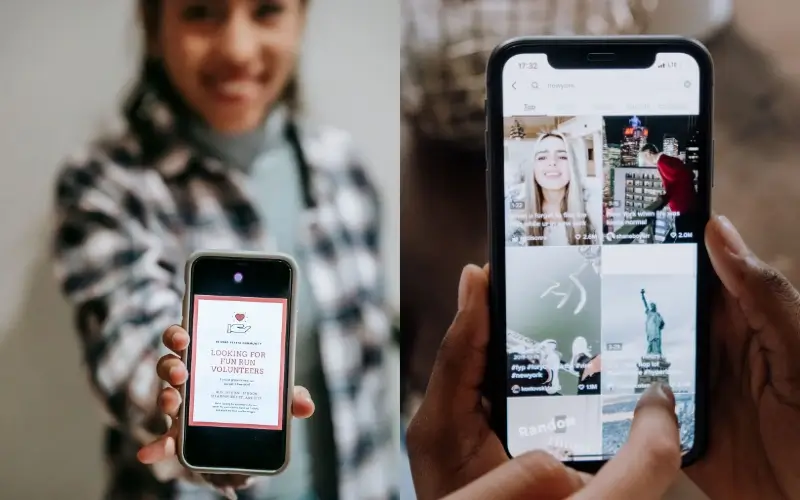
Even a perfectly planned event won’t succeed if the right people aren’t in the room. When to start promoting depends on the type of event and audience. An internal team-building workshop may only need a short promotion window, while a larger virtual conference for a specific professional audience may need more time.
As a general rule, start promoting your virtual event at least 1 to 2 months before the event. This gives you enough time to build awareness early, run reminder campaigns, and create urgency closer to the event date. That final push matters because registration behavior is increasingly last minute. According to event industry statistics, nearly 50% of event registrations happen within the final seven days before an event, while 15% happen on the day of the event itself.
Your promotion strategy should focus on one thing: clearly communicating why this event is worth attending.
Where to promote
Use a blend of event marketing strategies and channels for event promotion to reach your audience where they already hang out. This includes email marketing campaigns, LinkedIn updates, partner newsletters, social media event promotion, and community posts. Don’t overlook the power of your speakers and partners, when they promote the event, they’re lending you the trust they’ve already built with their own followers. For a bit more punch, consider short teaser videos or a dedicated blog post that highlights the event’s biggest takeaways.
Crafting the message
Stop treating your event like a generic online meeting. Focus your messaging on the attendee’s experience: Who is this for? What will they learn? Who will they meet? And most importantly, what can they do differently once the event is over? Highlight your speakers, the networking opportunities, and any exclusive resources that attendees can only get by showing up live.
You can also use AI to make your promotion more targeted. Instead of sending the same message to everyone, AI tools can help segment your audience, personalize email copy, test subject lines, and adjust campaigns based on registration behavior. This makes your event marketing feel more relevant while helping you improve registrations and attendance through smarter AI event marketing. This is already becoming a practical use case for event teams. The State of AI and XR in Events Field Report 2026 by Events.com, which surveyed how organizers are using AI across the event lifecycle, found that 38% of organizers use AI for event marketing.
For more practical ideas, you can check out these AI tips for events.
The reminder sequence
Don't just rely on the initial sign-up email. A solid reminder cadence is essential for high turnout:
- Registration confirmation: Send immediately with the event link, calendar invite, time zone, and basic access instructions.
- One-week reminder: Highlight the agenda, speakers, and key reasons to attend.
- One-day reminder: Confirm the joining link, time zone, platform instructions, and participation details.
- One-hour or 15-minute reminder: Make it easy to join live by placing the access link and agenda at the top.
Always make sure these emails include the event link, local time zone, a quick agenda overview, and clear access instructions so there’s zero friction when the session starts.
Step 9: Host the Virtual Event Live
On event day, your job is to make the experience feel smooth, clear, and easy to follow. Attendees should know where they are, what is happening next, and how to participate.
Before attendees join
Give yourself plenty of time to get ready. Open the event early to double-check your settings, confirm your speakers are connected, and ensure your recording is set to trigger automatically. If you’re utilizing networking tables or sponsor booths, do one final walkthrough to make sure everything is live and accessible.
During the event
Start with a warm, clear welcome. Set the stage by explaining how attendees can participate, clarifying if the session is being recorded, and showing them exactly where to go for breakouts or networking. As the host, your role is to keep the momentum going, introduce your speakers with energy, bridge the gap between sessions, and keep the conversation moving.
If you’re hosting a hybrid event, be extra intentional about including remote attendees. Repeat questions from the room, make sure virtual attendees know how to participate, assign someone to monitor the online chat, and avoid designing the experience only around the in-person audience.
If something goes wrong
Tech hiccups happen, so be ready to manage them without breaking the experience. Keep a few "filler" questions for the speakers in your back pocket, have backup slides ready to go, and designate a backup host to take over if your primary connection drops.
Use a private team chat to coordinate behind the scenes so the audience doesn’t see the gears turning. You can also use an AI chatbot to handle basic attendee questions, such as where to find the agenda, how to join a session, or what to do if they have access issues, so your team can focus on managing the live experience. If a delay is unavoidable, acknowledge it quickly, keep your tone calm, and pivot the audience into a different activity or a quick networking prompt until things are back on track.
Step 10: Follow Up and Measure Success
A virtual event does not end when the stream stops. To keep the momentum going, start post-event communication within 24 to 48 hours while the experience is still fresh in attendees’ minds. This is also the right time to repurpose your event content so the value continues beyond the live session.
What to send after the event
Your follow-up should be more than a “thanks for coming” note. Include the event recording, slide deck, relevant resources, survey, sponsor links if relevant, and a clear next step. You can also add a networking follow-up prompt to help attendees continue the conversations they started during the event.
What to measure
Focus on the metrics that show whether the event reached the right audience, kept people engaged, and supported your business goals. Useful metrics include:
- Registration-to-attendance rate
- Attendance duration
- Drop-off points
- Chat activity
- Q&A participation
- Poll or quiz responses
- Networking participation
- Sponsor interactions
- Leads generated
- Meetings booked
- Survey score
- Revenue influenced
These virtual event metrics help you understand whether the event attracted the right audience, kept them engaged, and moved them toward the intended next step.
How to use the data
Use the data to improve future events, qualify leads, prove sponsor value, and report ROI to stakeholders. For example, if networking participation was high but session attendance dropped, your next event may need shorter presentations and more discussion time. Every event should give you insight into how to make the next one stronger. AI can also help you review post-event data faster by summarizing survey responses, grouping attendee feedback into themes, identifying common drop-off points, and turning event recordings into follow-up content.
Repurpose event content
Your event recording can become more than an on-demand replay. Turn key moments into short video clips, blog posts, social media posts, email follow-ups, quote graphics, or resource pages. This helps you reach people who missed the live event, gives attendees useful takeaways to revisit, and extends the value of your event long after it ends.
How to Use AI to Host a Better Virtual Event
AI is quickly changing how teams plan, promote, and manage events. For virtual events, it can simplify time-consuming work like agenda planning, audience segmentation, reminder emails, and post-event analysis. Instead of using AI only to write copy, treat it as a support layer that helps you create a more organized, personalized, and data-informed event experience.
- Before the event: Brainstorm session ideas, draft agendas, write promotional emails, personalize attendee messaging, and create reminder campaigns.
- During the event: Help moderators generate discussion prompts, summarize audience questions, support attendee guidance, and keep engagement moving.
- After the event: Analyze feedback, identify drop-off points, summarize survey responses, and repurpose event content into follow-up emails, blog posts, or social media clips.
AI can support almost every stage of the virtual event process. The goal is not to replace human hosting, but to use AI as a support tool that makes the event easier to plan, run, and improve.
Common Virtual Event Mistakes to Avoid
Even experienced organizers hit a few bumps when hosting online. The secret is to spot the risks early and build your plan to avoid them.
These best practices help you steer clear of the most common reasons online events end up feeling flat, confusing, or forgettable.
Helpful Resources for Planning Your Next Virtual Event
If you want to go deeper, these resources can help you plan, promote, engage, and measure your next virtual event:
- Virtual event checklist: Use this to make sure your goals, platform, speakers, promotion, engagement plan, and follow-up are covered before event day.
- 30 ideas to boost virtual event engagement: Explore practical engagement ideas you can use before, during, and after your event.
- 14 virtual event gamification ideas and examples: Use these examples to make your event more interactive with games, challenges, rewards, and friendly competition.
- Virtual event budget: Plan your costs more clearly, from platform and production needs to speakers, promotion, and sponsor requirements.
- Virtual event ROI guide: Learn how to measure event performance, prove value to stakeholders, and connect engagement data to business outcomes.
- On-demand masterclass: Explore Remo’s event masterclasses for more expert guidance on planning and hosting better online experiences.
- ChatGPT prompts to promote your event: Use this prompt resource to brainstorm event messaging, promotional emails, social posts, and reminder campaigns faster.
Host a Virtual Event People Actually Want to Attend
A well-run virtual event comes down to clear goals, a smooth registration flow, a focused agenda, prepared speakers, planned engagement, and a follow-up strategy that shows what worked.
The platform you choose shapes how much of that experience is possible. A basic meeting tool can work for a simple webinar, but if your event depends on networking, group discussion, sponsor visibility, or attendee movement, you need a platform built for interaction. Remo supports that with virtual tables, presentation mode, networking spaces, and tools that help attendees move naturally between conversations and content.
Book a demo to see how Remo helps teams host virtual events built around conversation, connection, and measurable engagement.
Frequently Asked Questions about Hosting a Virtual Event
1. How do you host a virtual event?
Start by defining your goal, audience, budget, and success metrics. Then choose a platform, build an agenda, prepare speakers, promote the event, rehearse, go live, and follow up.
2. What is the best platform to host a virtual event?
The best platform depends on your event goal, size, and interaction needs. For networking, conferences, hiring events, or sponsor-led events, a dedicated virtual event platform, like Remo, is usually better than a basic meeting tool, like Zoom.
3. How do you make a virtual event engaging?
Plan interaction before, during, and after the event. Use chat prompts, polls, Q&A, breakout rooms, table discussions, quizzes, and networking prompts to keep attendees involved.
4. How long should a virtual event be?
Many webinars work well in the 45 to 60 minute range, while networking events often need 60 to 90 minutes to give attendees enough time to connect. Longer virtual conferences can work if you include breaks, shorter sessions, and varied activities.
5. What should you do after a virtual event?
Send a thank-you email within 24 to 48 hours with the recording, resources, survey, and next steps. Then review attendance, engagement, drop-off points, leads, and feedback to improve future events.
6. How much does it cost to host a virtual event?
The cost of hosting a virtual event depends on event size, platform, production needs, speaker fees, promotion, and sponsor requirements. A simple webinar may only need a low-cost meeting tool, while a larger networking event or virtual conference may require a dedicated virtual event platform with branded setup, sponsor spaces, and production support. Remo pricing's paid plans start at $299/month, with a 14-day free trial available.
Aniqa Iqbal
Aniqa is a content writer at Remo, where she merges her love for storytelling from movies and TV shows with her passion for creating compelling content. With a knack for blending pop culture references and relatable narratives, Aniqa crafts content that informs and resonates deeply with readers. She aims to strike a chord with her audience, fostering genuine connections through words that inspire, engage, and entertain. When she's not writing, Aniqa can be found binge-watching her favorite shows, always on the lookout for the next story to tell.